Accounting software for everyday business.
Connect to Xero
Navigate to the Settings page and move to the Connectors tab. Click on ERP to access the Xero connector. Click on the Connect button on the Xero card, as shown in Fig. 1:
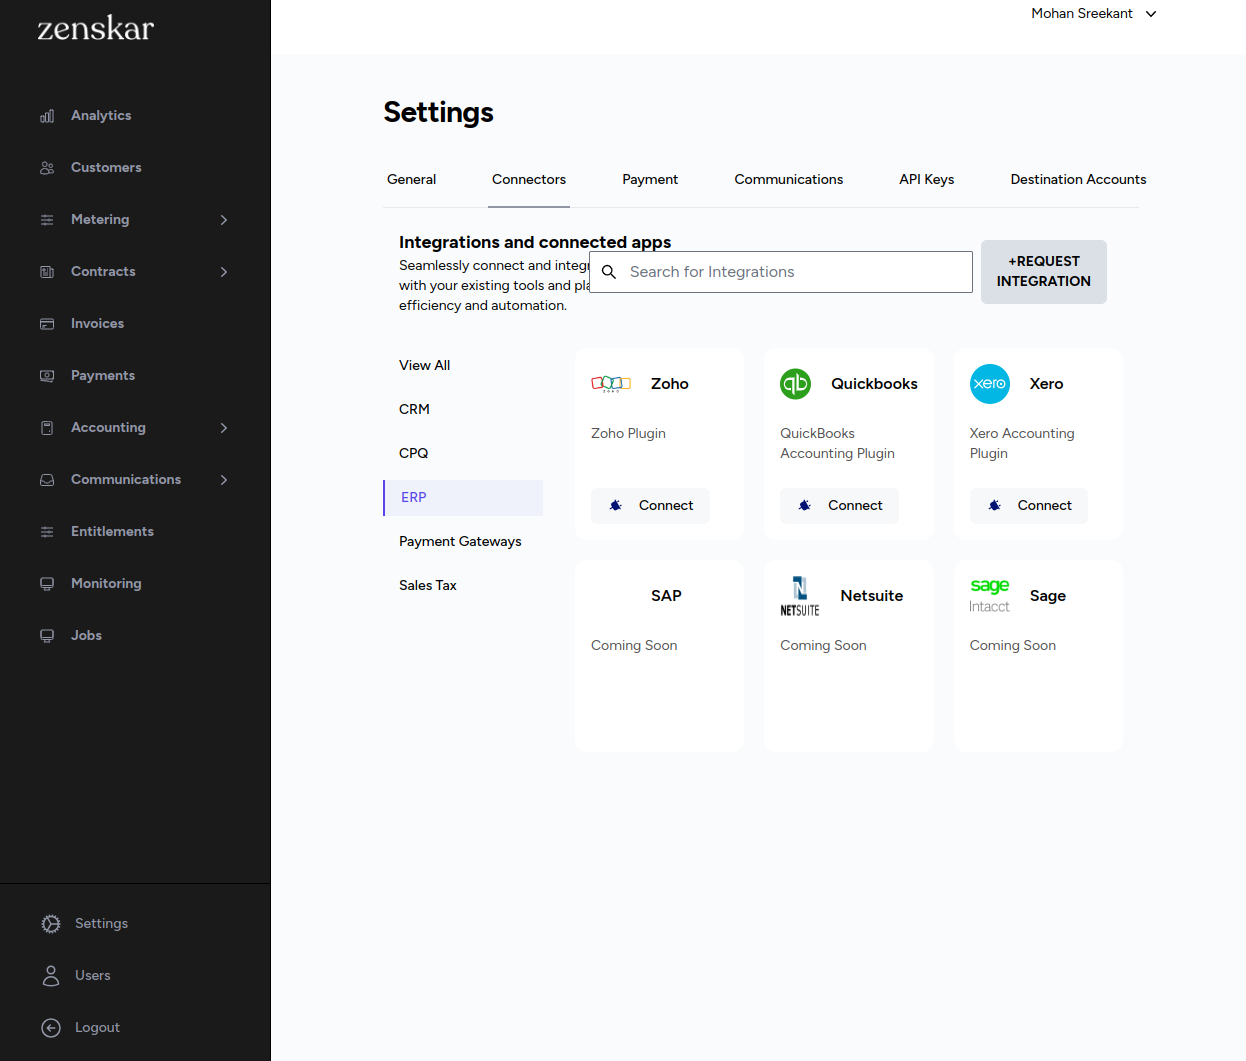
Fig. 1: ERP connectors
The following page will be displayed:
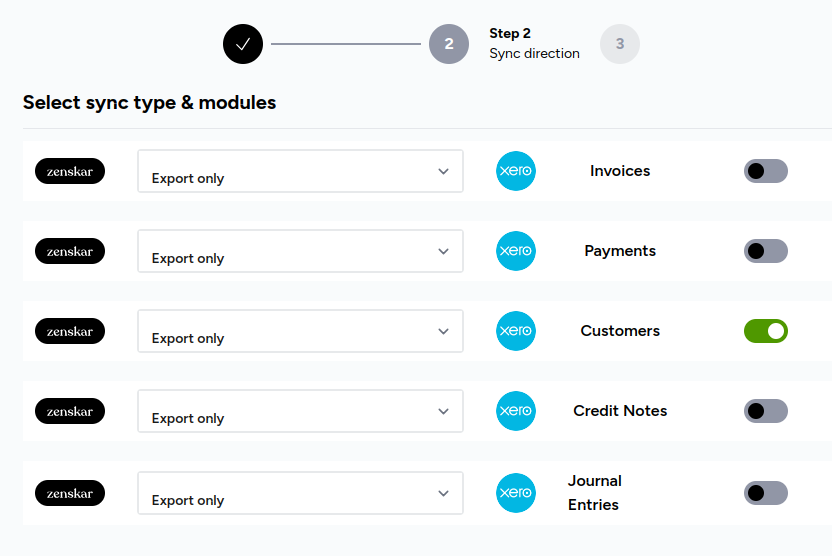
Sync type
Currently, Zenskar supports only one-way sync via the Export only option. Work is in progress for a two-way sync and will be available soon.
Account Mapping
The account mapping will be as shown in Fig. 2:
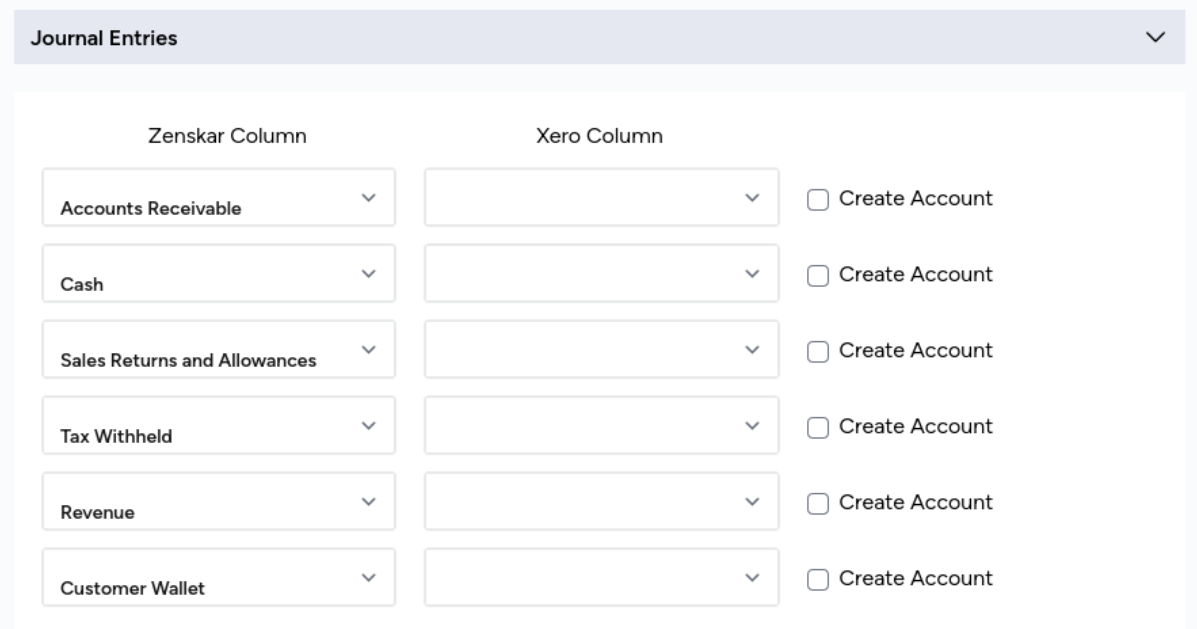
Fig. 2: Zenskar and Xero mapping
Each Zenskar account must be mapped with an account on Xero, as shown in Fig. 3. The dropdown shows all the non-system accounts present on Xero i.e., accounts for which journal entry creation is possible. You can select an appropriate account:
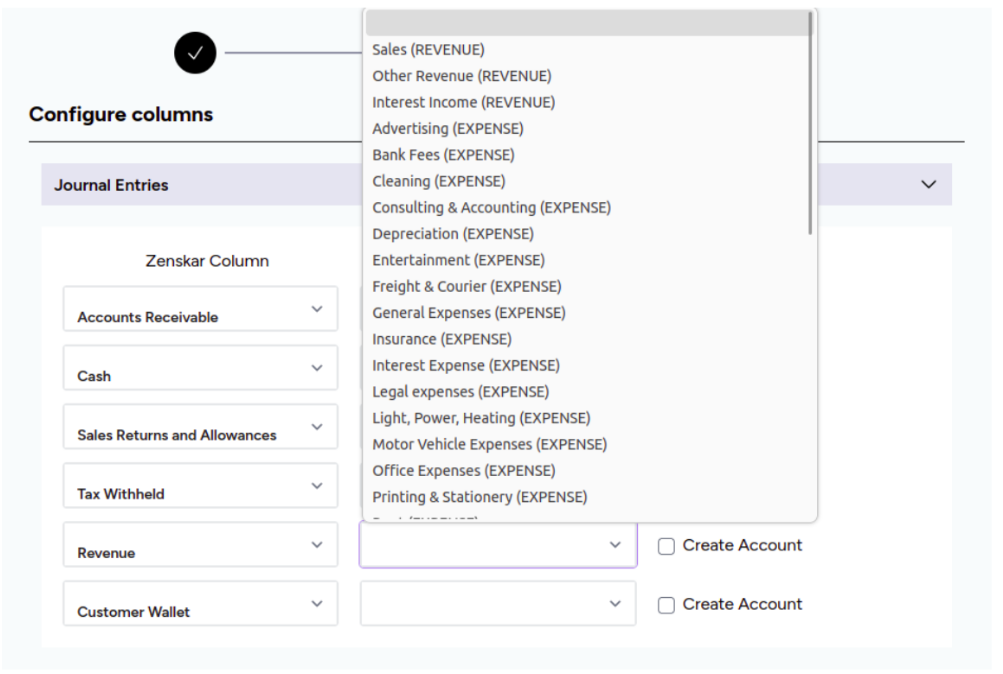
Fig. 3: Zenskar and Xero mapping
If you find that the accounts listed are inappropriate, you can create a new account by checking the Create Account checkbox beside the dropdown. An account creation window shall appear, as shown in Fig.4:
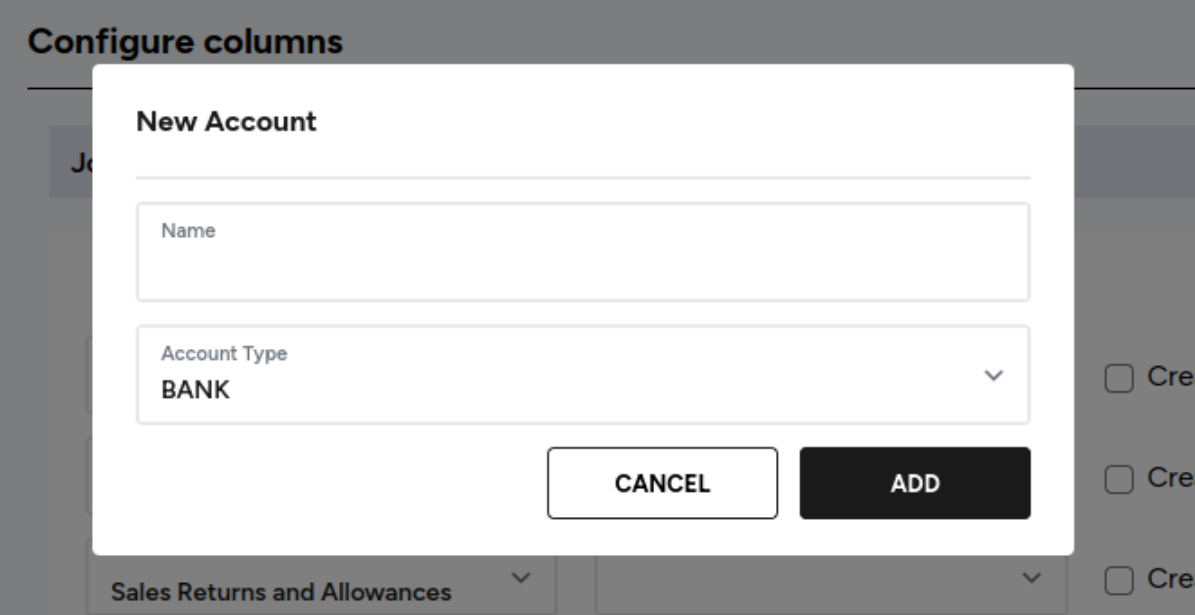
Fig. 4: New Xero account creation window
- Enter an name in the Name field.
- Select an account type in the Account Type dropdown. The dropdown contains all account types supported by Xero.
- Click on ADD. You have successfully configured Xero.
How Zenskar journal entries look on Xero
Xero does not allow you to create entries with line amount equal to zero. Therefore, entries created with line amount zero such as Free units are not synced with Xero.
The actual Accounts Receivable and other system accounts cannot be used to create Journals. This is a known limitation of Xero. Therefore, you should map the Zenskar Accounts Receivable with something similar in Xero. For example, you can use the Create Account checkbox to create a new account with similar name in Xero.
Example 1: When credits are issued to a Customer
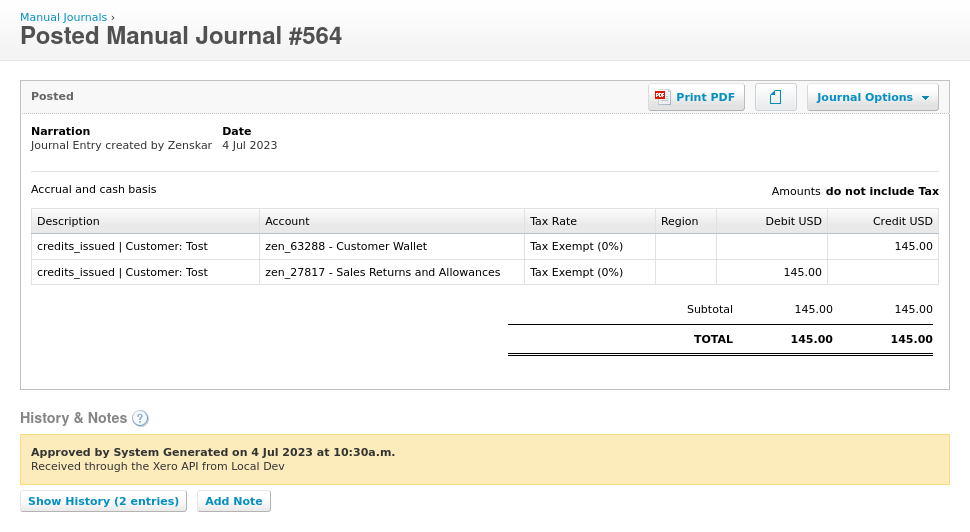
System account names for these entries are:
- Customer Wallet: 4a003f19-ae13-4fe2-b7bb-98666a8abcd
- Expenses: Sales Returns and Allowances: 4a003f19-ae13-4fe2-b7bb-98666a8abcd
Example 2: When an invoice is approved
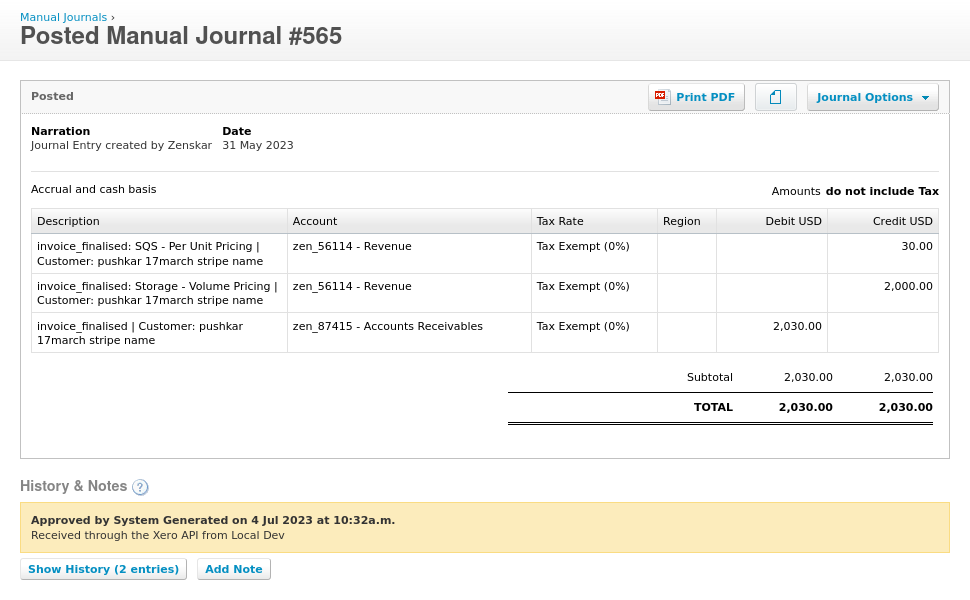
System account names for these entries are:
- Revenue: Storage - Volume Pricing: 4d24700c-29de-4351-aa5a-965e3334abcd
- Revenue: SQS - Per Unit Pricing: 4d24700c-29de-4351-aa5a-965e3334abcd
- Assets: Accounts Receivable: 4d24700c-29de-4351-aa5a-965e3334abcd
Example 3: When a payment is made
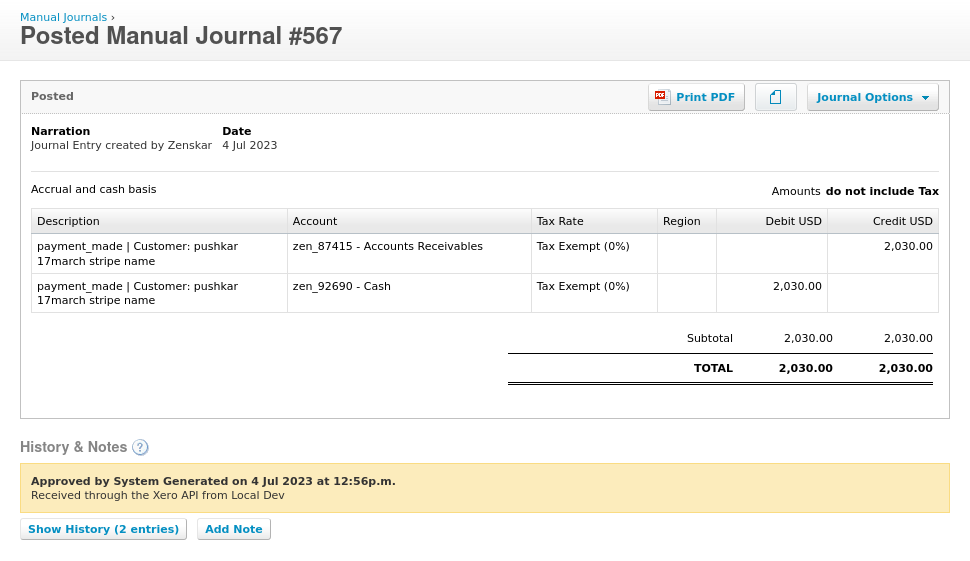
System account names for these entries were:
Assets: Cash: 4d24700c-29de-4351-aa5a-965e3334abcd
Assets: Accounts Receivable: 4d24700c-29de-4351-aa5a-965e3334abcd
Usually the last element in the system account name is customer Id. Therefore it is ignored. All the accounts visible in the entries are created according to the mapping. The customer visible in the description is also created on Xero if it is not already present.