Fetch single-value billing determinants using aggregate functions that perform calculations on a set of values in a database column.
Introduction
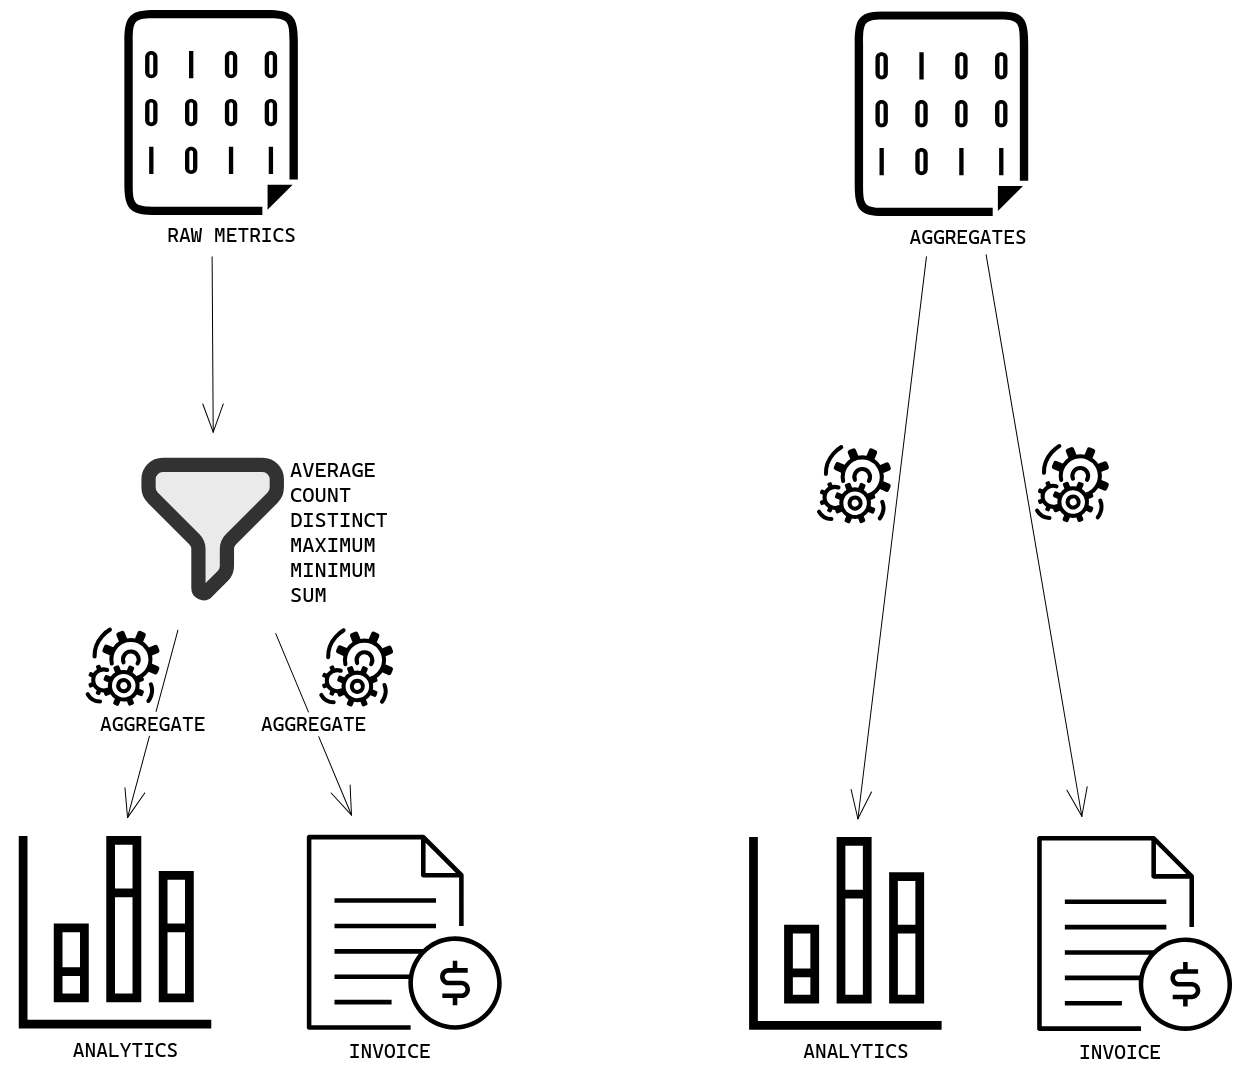
Fig. 1: Aggregates in Zenskar.
Prerequisites
You must configure a data source or a raw metric before trying to create usage aggregates.
Example raw-metric schema
This example-based guide uses a raw metric named telephone usage and the following schema. We are selling call minutes, SMS, and internet data.
{
  "data": {
    "sms": "int",
    "data": "float",
    "call_minutes": "float"
  },
  "timestamp": "timestamp",
  "customer_id": "string"
}
Example raw metric data
The following example events will be used in the guide.
| data.sms | data.data | data.call_minutes | timestamp | customer_id |
|---|---|---|---|---|
| 43 | 3.7 | 56.0 | 2024-04-16 11:33:38.000 | 8578d067-b019-471c-b28c-5a3f35a3d05a |
| 12 | 2.0 | 23.0 | 2024-04-17 11:25:02.000 | 8578d067-b019-471c-b28c-5a3f35a3d05a |
| 16 | 1.8 | 34.0 | 2024-04-18 11:25:43.000 | 8578d067-b019-471c-b28c-5a3f35a3d05a |
Example customer
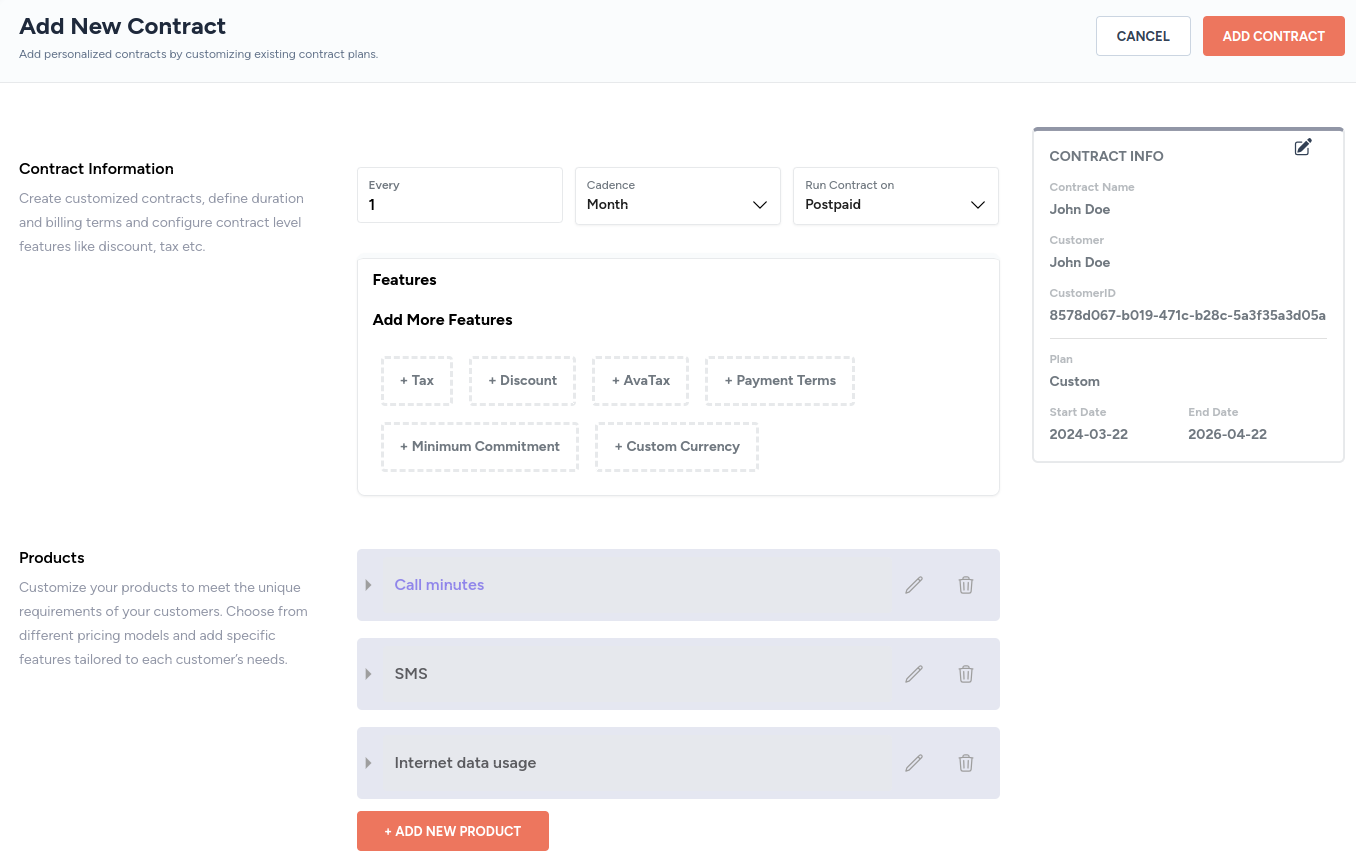
The customer ID 8578d067-b019-471c-b28c-5a3f35a3d05a belongs to a fictional customer named John Doe.

Fig. 2: John Doe, the example customer.
Add new aggregate
- Navigate to Metering > Usage Aggregates in the left side panel.
- On the Usage Aggregates page, click on the + ADD NEW AGGREGATE button.

Fig. 3: The Usage Aggregates page.
- On the Add New Aggregate page, there are two ways to add a new aggregate:
- Visual builder: a wizard that helps you build an aggregate query
- SQL builder: a SQL-based tool that helps you handcraft an aggregate query
Fig. 4: The Add New Aggregate page.
- Create the desired aggregate query using either the visual builder or the SQL builder.
- Click on the CREATE AGGREGATE button.
Add an aggregate using the visual builder
The wizard-based visual builder has four main steps:
- Select tables and filters
- Map customer
- Set date field
- Set aggregate over
Step 1: select tables and filters
There are two ways you can let Zenskar access your customers' data:
- data source
- raw metrics
Select data source
- Select the table that contains usage data.
- If the table you selected is related to a data source, the Data Source tag will appear below the Table Name drop-down.
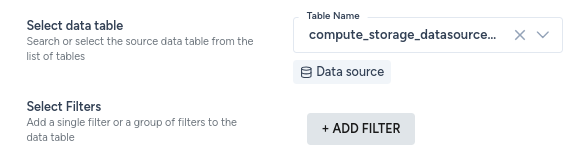
Fig. 5: Select data table: data source.
Select raw metrics
- Select the table that contains usage data.
- If the table you selected is related to a raw metric, the Raw Metric tag will appear below the Table Name drop-down.
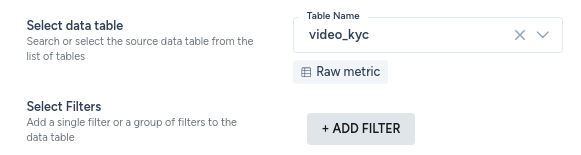
Fig. 6: Select data table: raw metric.
In this guide, we will use the telephone usage raw metric.
NOTE
You must add and configure raw metrics (or data sources) like telephone usage. Zenskar will transform all raw metrics (or data sources) into database tables like telephone_usage.
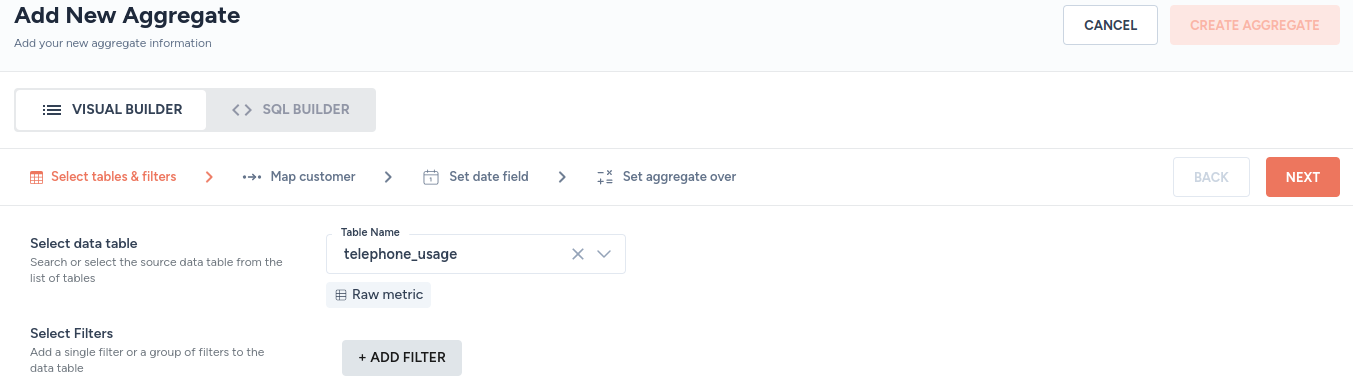
Fig. 7: The example raw-metric data table: telephone_usage.
Select filters
The raw-metric schema of telephone usage results in the following columns when Zenskar creates a SQL table:
| Columns |
|---|
| customer_id |
| timestamp |
| data.sms |
| data.call_minutes |
| data.data |
Filters can be created using any of these columns. The conditions available are dependent on the data type of the column selected. The data type--condition mapping is shown below:
| Data type | Conditions |
|---|---|
| Int64 Float64 Decimal | is is not less than greater than is empty is not empty |
| Bool | is is not is empty is not empty |
| Date32 DateTime64 | is is not is before is after is empty is not empty |
| String UUID | is is not contains does not contain starts with ends with is empty is not empty |
The data type of the column is determined by the schema you defined while creating a raw metric. A sample raw metric with all available data types is shown below:
{
    "customer_id": "String",
    "timestamp": "DateTime64",
    "data": {
        "a_string_field": "String",
        "an_int64_field": "Int64",
        "a_float64_field": "Float64",
        "a_date32_field": "Date32",
        "a_datetime64_field": "DateTime64",
        "a_UUID_field": "UUID",
        "a_bool_field": "Bool",
        "a_decimal_field": "Decimal"
    }
}
A simple filter
For the example data mentioned above, a simple filter based on timestamp can be created:
| Column | Condition | Value |
|---|---|---|
| timestamp | is before | 2024-04-18 |

Fig. 8: A simple filter.
This filter will yield the following result:
| customer_id | timestamp | data.call_minutes | data.sms | data.data |
|---|---|---|---|---|
| 8578d067-b019-471c-b28c-5a3f35a3d05a | 2024-04-17 11:25:02.000 | 23.0 | 12 | 2.0 |
| 8578d067-b019-471c-b28c-5a3f35a3d05a | 2024-04-16 11:33:38.000 | 56.0 | 43 | 3.7 |
All the raw-metric data that you sent to Zenskar for the customer 8578d067-b019-471c-b28c-5a3f35a3d05a whose timestamp is before the date 2024-04-18 is returned as the result.
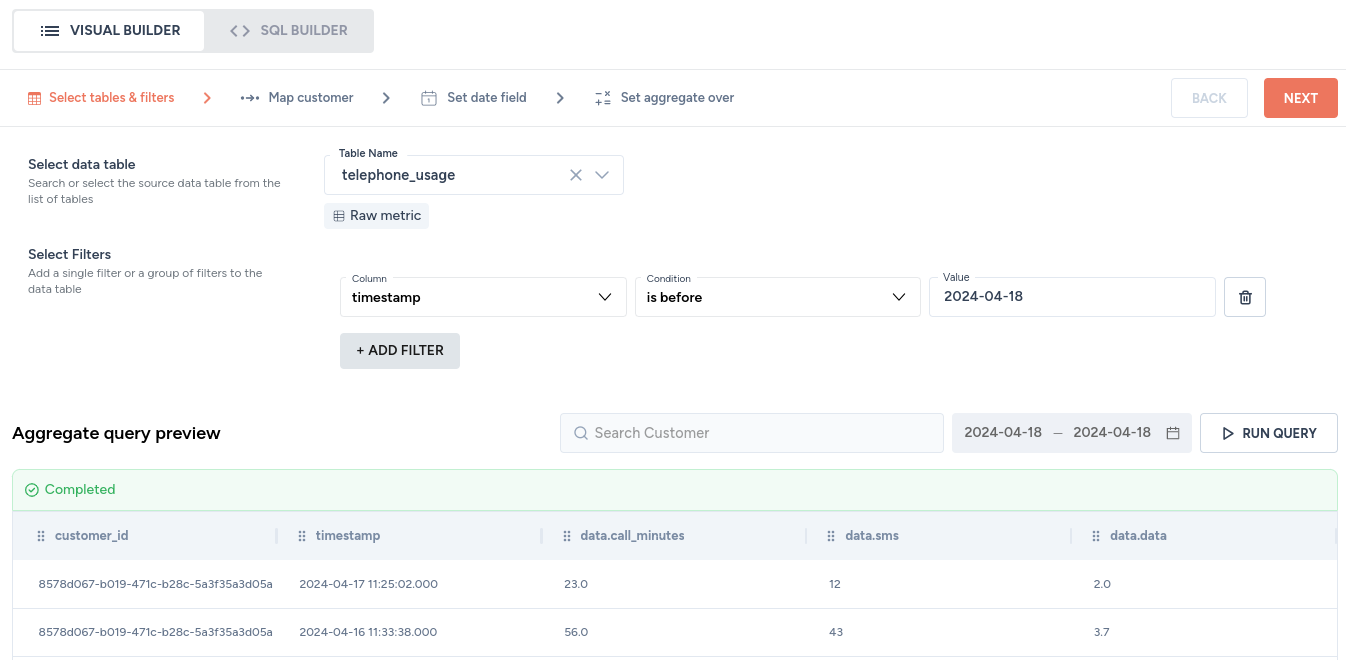
Fig. 9: A simple filter that fetches all data based on the timestamp database table column: customer is 8578d067-b019-471c-b28c-5a3f35a3d05a and the timestamp is before the date 2024-04-18.
A complex AND filter
For the example data mentioned above, a complex filter based on timestamp AND data.call_minutes can be created:
| Column | Condition | Value |
|---|---|---|
| timestamp | is before | 2024-04-18 |
| data.call_minutes | greater than | 30 |
This filter will yield the following result:
| customer_id | timestamp | data.call_minutes | data.sms | data.data |
|---|---|---|---|---|
| 8578d067-b019-471c-b28c-5a3f35a3d05a | 2024-04-16 11:33:38.000 | 56.0 | 43 | 3.7 |
All the raw-metric data that you sent to Zenskar for the cusotmer 8578d067-b019-471c-b28c-5a3f35a3d05a before the date 2024-04-18 ANDwhere data.call_minutes is greater than 30 is returned as the result.
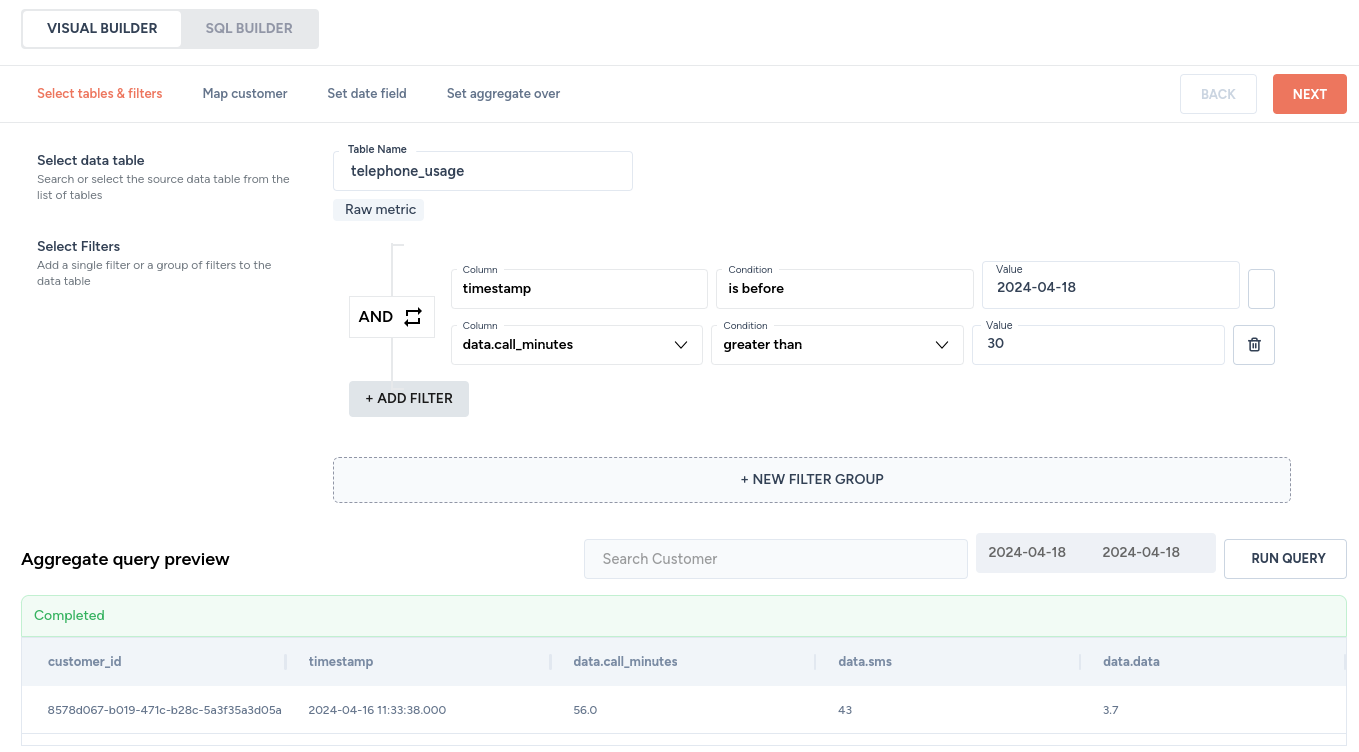
Fig. 10: A complex AND-based filter
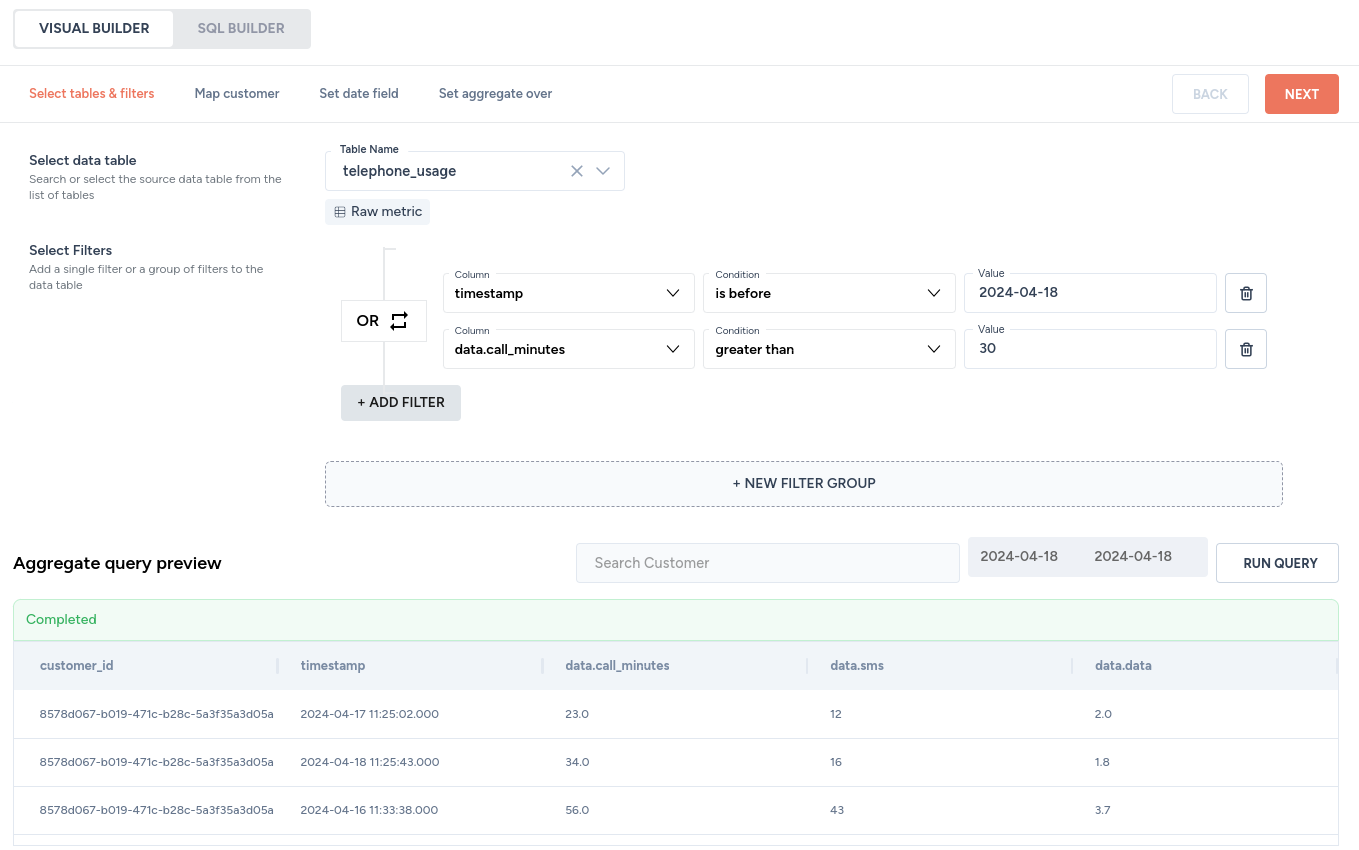
A complex OR filter
Simply clicking on the AND condition will change it to OR and vice versa, as shown below.
For the example data mentioned above, a complex filter based on timestamp OR data.call_minutes can be created:
| Column | Condition | Value |
|---|---|---|
| timestamp | is before | 2024-04-18 |
| data.call_minutes | greater than | 30 |
This filter will yield the following result:
| customer_id | timestamp | data.call_minutes | data.sms | data.data |
|---|---|---|---|---|
| 8578d067-b019-471c-b28c-5a3f35a3d05a | 2024-04-17 11:25:02.000 | 23.0 | 12 | 2.0 |
| 8578d067-b019-471c-b28c-5a3f35a3d05a | 2024-04-18 11:25:43.000 | 34.0 | 16 | 1.8 |
| 8578d067-b019-471c-b28c-5a3f35a3d05a | 2024-04-16 11:33:38.000 | 56.0 | 43 | 3.7 |
All the raw-metric data that you sent to Zenskar for the cusotmer 8578d067-b019-471c-b28c-5a3f35a3d05a before the date 2024-04-18 ORwhere data.call_minutes is greater than 30 is returned as the result.
Step 2: map customer
You must select a column in your table that can uniquely identify your customers.
-
This can also be your customer's email ID
-
You must map this column to one of the following columns in Zenskar:
- external_id: this is usually a unique identifier (UUID) that your system generates or is generated by your CRM.
- customer name
Note
The Zenskar columns
external_id, andcustomer nameare created when you add your customer to Zenskar.


Step 3: set date field

Step 4: set aggregate over
Note
Refer the documentation on data processing to understand how aggregates work.
- Select the aggregation method:
| Aggregate | Description |
|---|---|
| COUNT | returns the number of items found in a column |
| SUM | returns the sum of all the values, or only the DISTINCT values, in the column. SUM can be used with numeric columns only. Null values are ignored. |
| MAX | returns the maximum value in a column. |
| MIN | returns the minimum value in a column. |
| AVG | returns the average of the values in a column ignoring null values. |
| UNIQUE COUNT |
- Select the column over which the aggregation must be performed.
COUNT
For the example data mentioned above, COUNT will return 3 for any column.

SUM
For the example data mentioned above, SUM will return the following values:
| Aggregate type | Aggregate value returned |
|---|---|
| data.call_minutes | 113.0 |
| data.sms | 71 |
| data.data | 7.5 |
NOTE
The
SUMaggregate must be performed over columns of numeral data type: int, float, bigint, double, tinyint, smallint. Trying toSUMcolumn of any other data type will result in the following error:


MAX
For the example data mentioned above, MAX will return the following values:
| Aggregate type | Aggregate value returned |
|---|---|
| data.call_minutes | 56.0 |
| data.sms | 43 |
| data.data | 3.7 |
NOTE
The
MAXaggregate must be performed over columns of numeral data type: int, float, bigint, double, tinyint, smallint. Trying to runMAXaggregate over a column of any other data type will result in the following error:


MIN
For the example data mentioned above, MIN will return the following values:
| Aggregate type | Aggregate value returned |
|---|---|
| data.call_minutes | 23.0 |
| data.sms | 12 |
| data.data | 1.8 |
NOTE
The
MINaggregate must be performed over columns of numeral data type: int, float, bigint, double, tinyint, smallint. Trying to runMINaggregate over a column of any other data type will result in the following error:
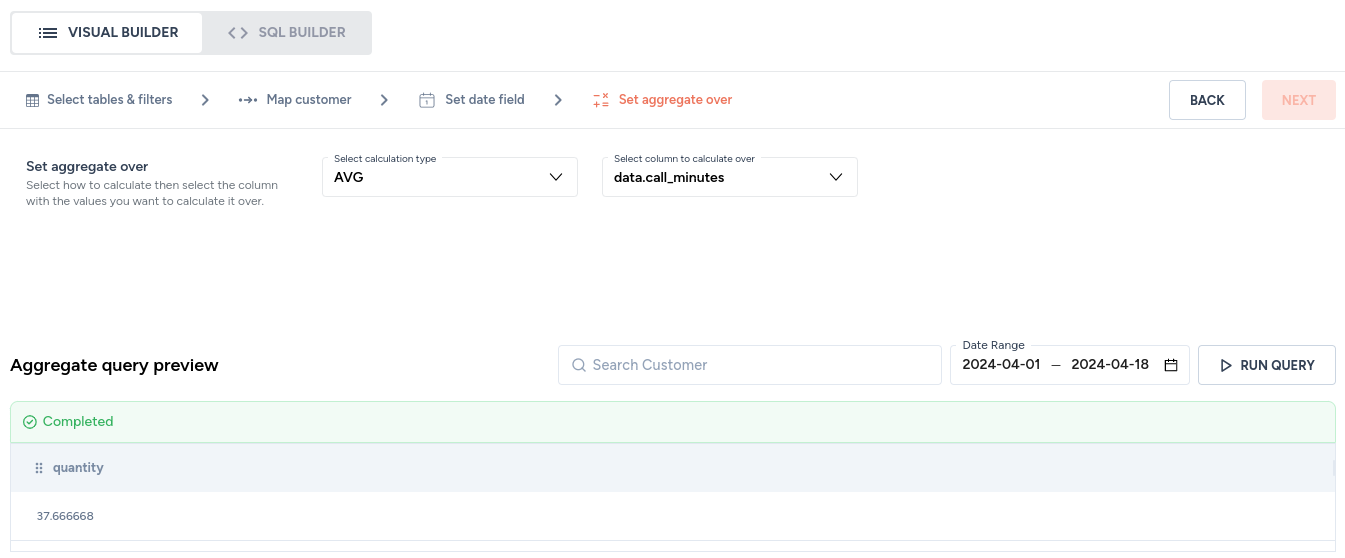
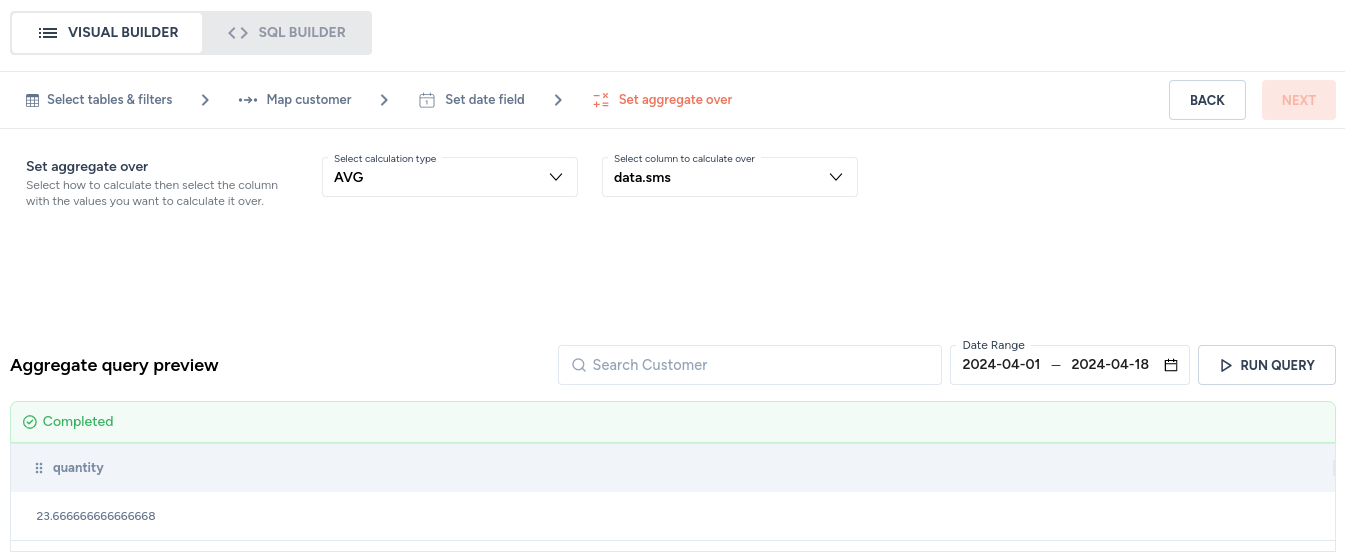
AVG
For the example data mentioned above, AVG will return the following values:
| Aggregate type | Aggregate value returned |
|---|---|
| data.call_minutes | 37.666668 |
| data.sms | 23.666666666666668 |
| data.data | 2.5 |
NOTE
The
AVGaggregate must be performed over columns of numeral data type: int, float, bigint, double, tinyint, smallint. Trying to runAVGaggregate over a column of any other data type will result in the following error:


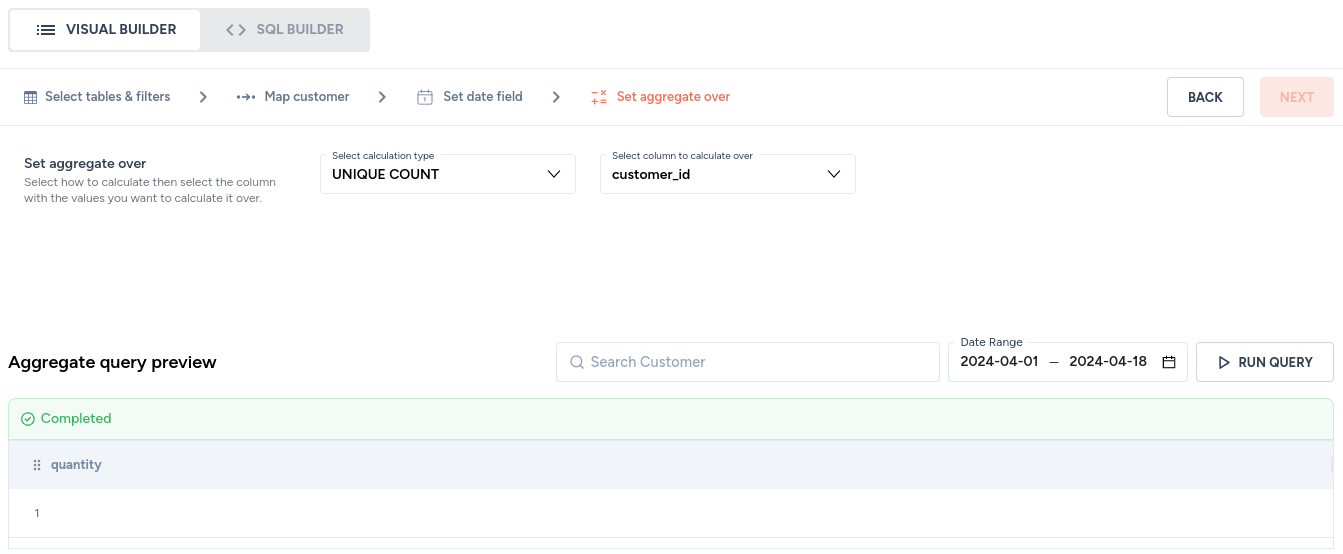
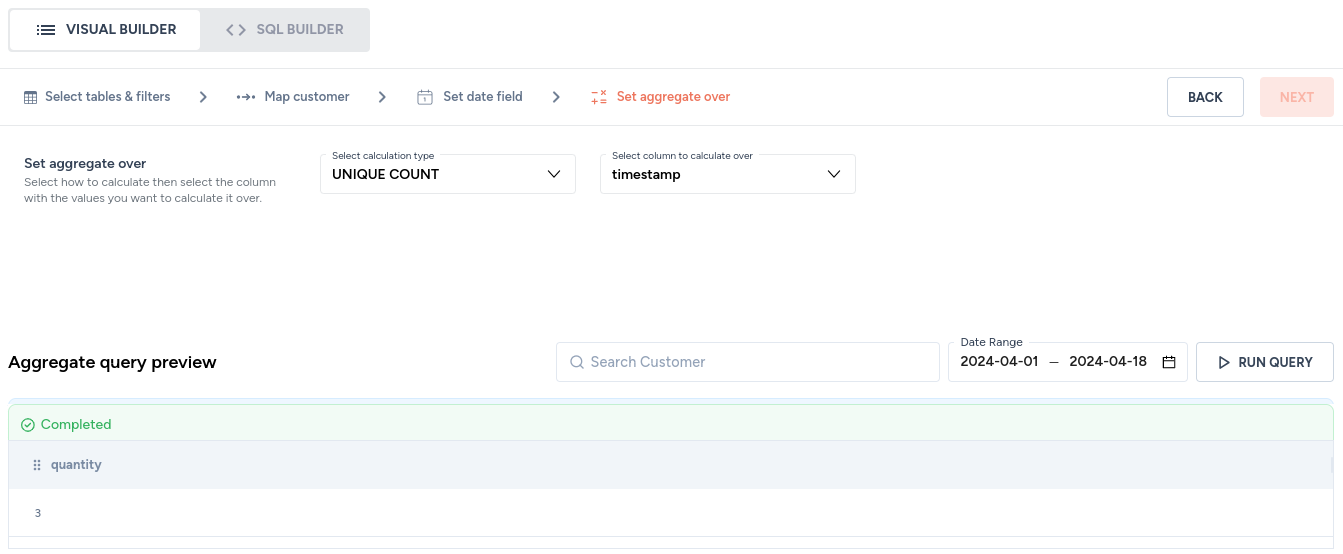
UNIQUE COUNT
For the example data mentioned above, UNIQUE COUNT will return the following values:
| Aggregate type | Aggregate value returned | Notes |
|---|---|---|
| customer_id | 1 | In the example data mentioned above, there exists only one customer with 8578d067-b019-471c-b28c-5a3f35a3d05a as ID. |
| timestamp | 3 | In the example data mentioned above, there exist three unique timestamps. |
| data.call_minutes | 3 | In the example data mentioned above, there exist three unique call-minute entries. |
| data.sms | 3 | In the example data mentioned above, there exist three unique SMS entries. |
| data.data | 3 | In the example data mentioned above, there exist three unique internet-data-usage entries. |
SQL builder
You can build raw SQL queries using the SQL builder. You can choose the SQL builder:
- as an alternative to the visual builder to create aggregate queries
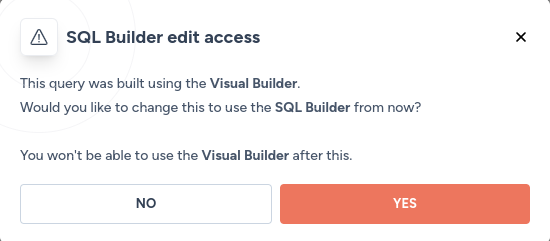
- to edit queries built by visual builder
NOTE
You can switch to the SQL builder to edit an aggregate query built using the visual builder. However, this switch is permanent, and you will not be able to switch back to the visual builder.
Features of the SQL builder
- Table browser: select the table you are interested in to list all columns. The column names can be copied and used in the SQL builder
 . The Zenskar variables that can be used in the SQL queries are also available below the table browser.
Engineering effort required
Creating raw SQL queries for complex scenarios is the job of an engineer proficient in SQL.
Tying it all together
Create aggregates for the example data
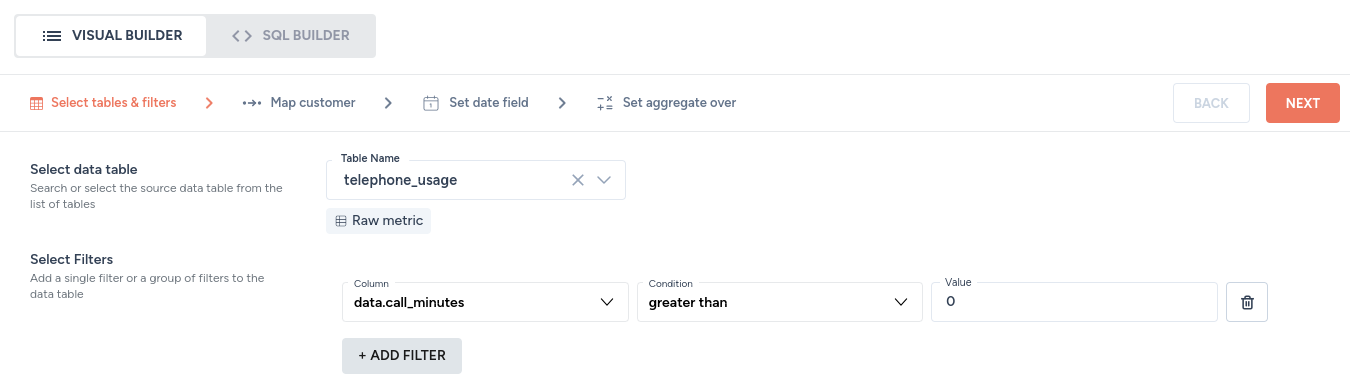
Select database table and create filter
For the database table telephone_usage, create the following filter:
| Column | Condition | Value |
|---|---|---|
| data.call_minutes | greater than | 0 |
Map customer

Set date field

Set aggregate over the desired field
We will use the SUM aggregate to determine the total call minutes during the billing period.

Create aggregate
Provide a name that describes your aggregate.

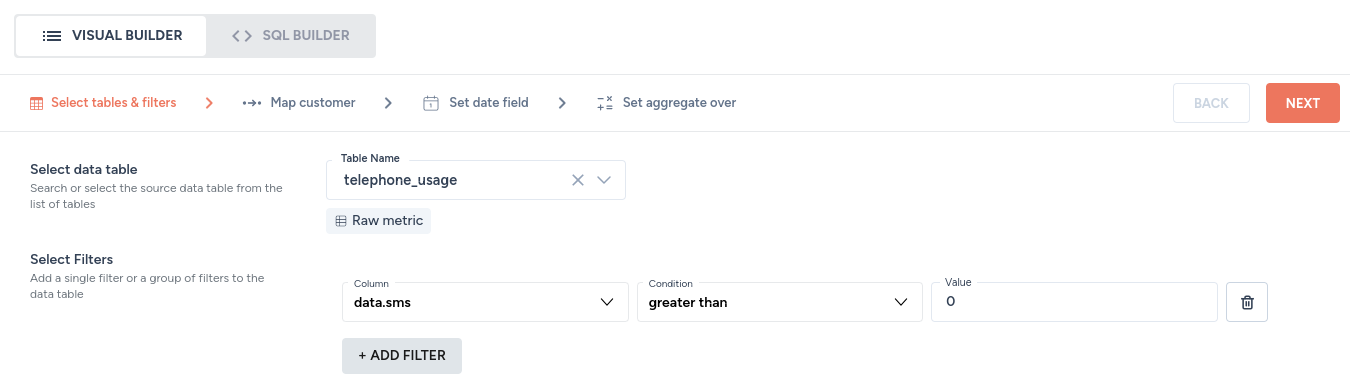
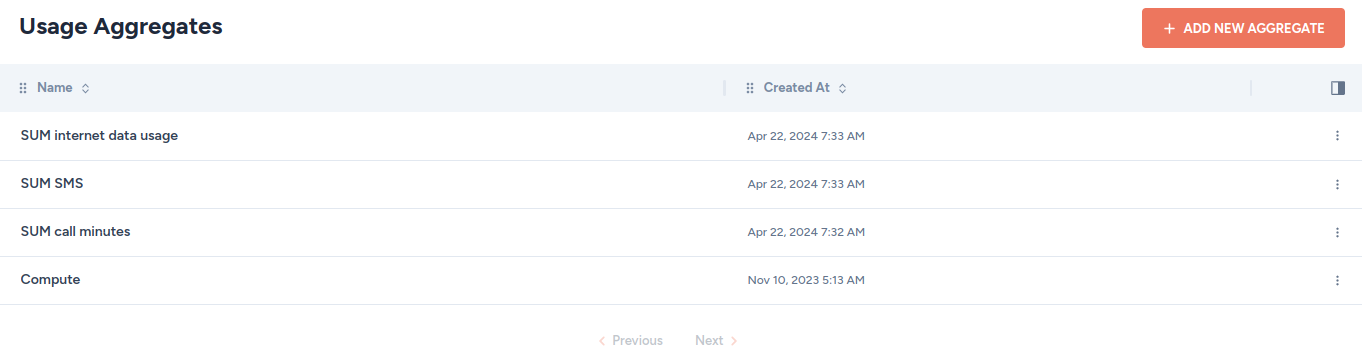
Create an aggregate for SMS and internet data usage
Create two more aggregates for SMS and internet data usage. Repeat the steps you followed creating the aggregate for call minutes.

Navigate to Metering > Usage Aggregates to view all the aggregates you created, as shown below.
Create products that use these aggregates
Create a product for call minutes offered

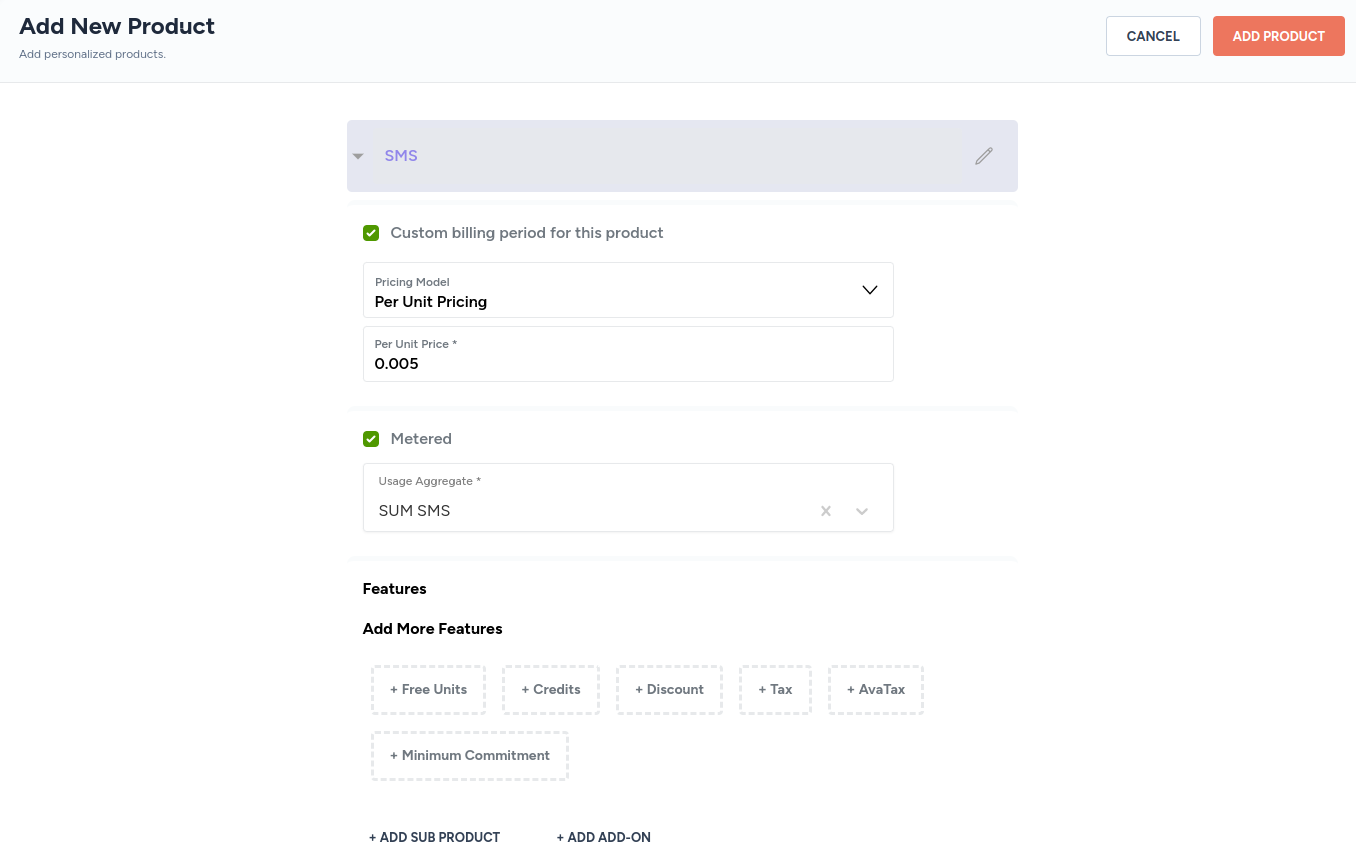
Create a product for SMSes offered
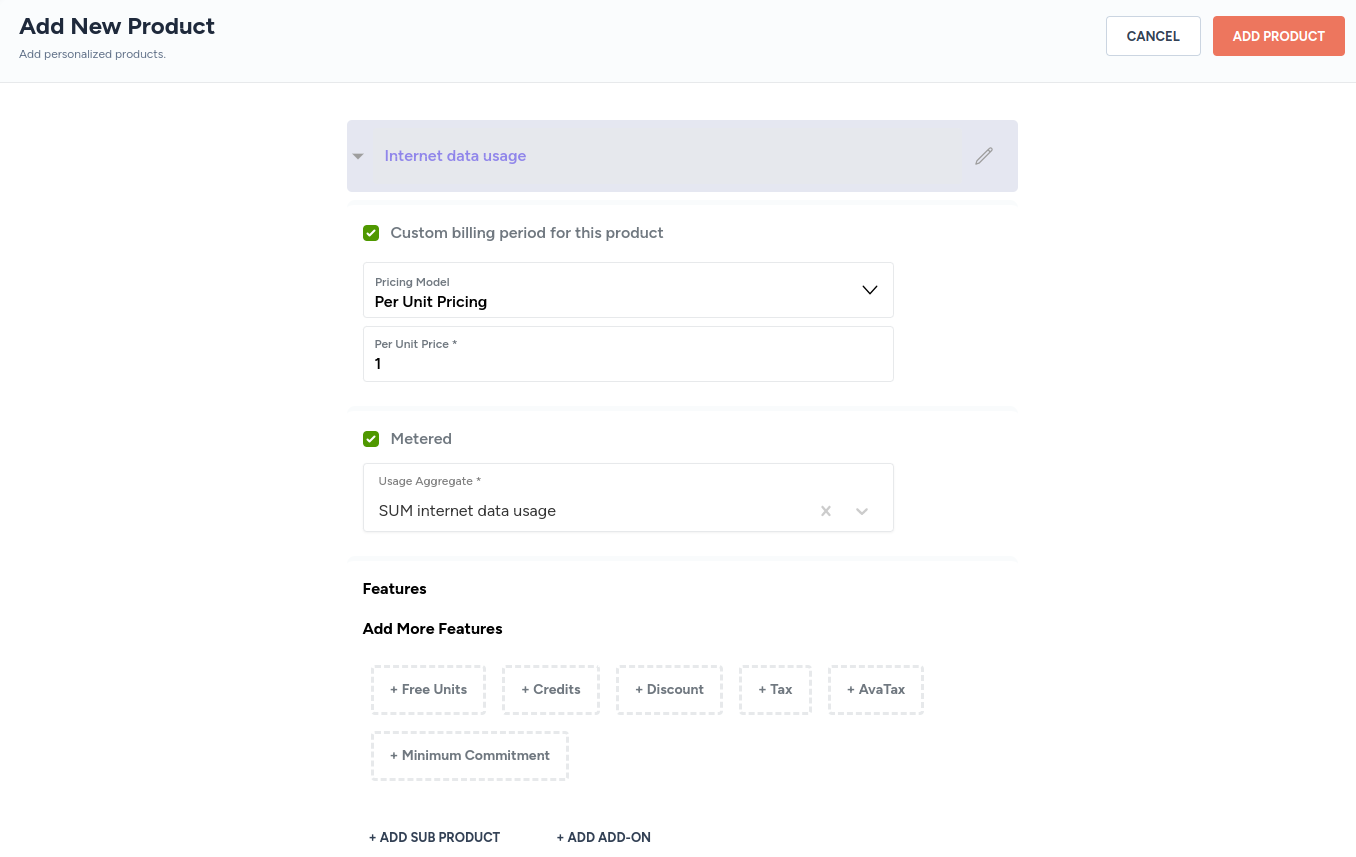
Create a product for internet data offered
Create a contract that uses these products