HubSpot is a CRM platform with all the software, integrations, and resources you need to connect marketing, sales, content management, and customer service.
⚙️ Connect with HubSpot
- Click on the named drop-up menu located at the bottom of the side panel.
- Click on Setting menu option.

Fig. 1: Named drop-up menu
- On the Settings page, move to the Connectors tab.
- Click on CRM category to access the HubSpot connector.
- Click on the Connect button on the HubSpot card, as shown in Fig. 1.
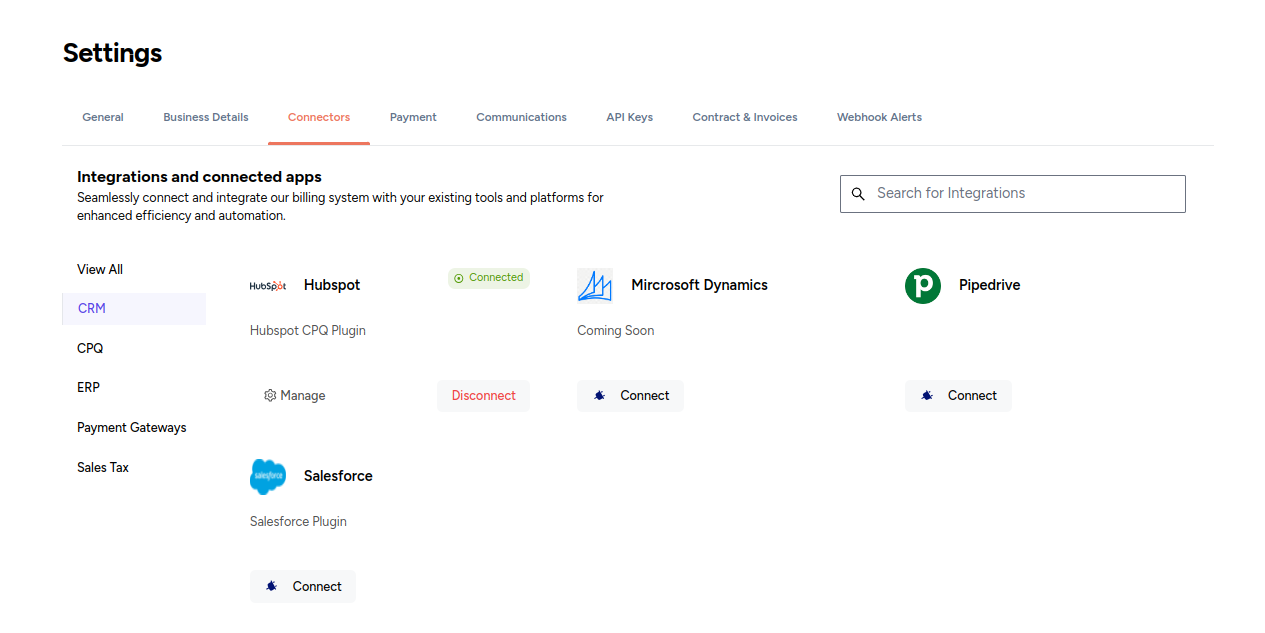
Fig. 2: CRM Connectors
⚙️ Connector setup
There are three Zenskar objects available for syncing with HubSpot:
- Contract
- Customers
- Products
There are three sync modes available:
- Import only: a one-way sync in which data can be imported from HubSpot to Zenskar
- Export only: a one-way sync in which data can be exported from Zenskar to HubSpot
- Import & Export: a two-way sync of data between Zenskar and HubSpot
You must select the objects you wish to sync. You must also select the sync type.
Note
For a contract, export works only if the contract was created in HubSpot.
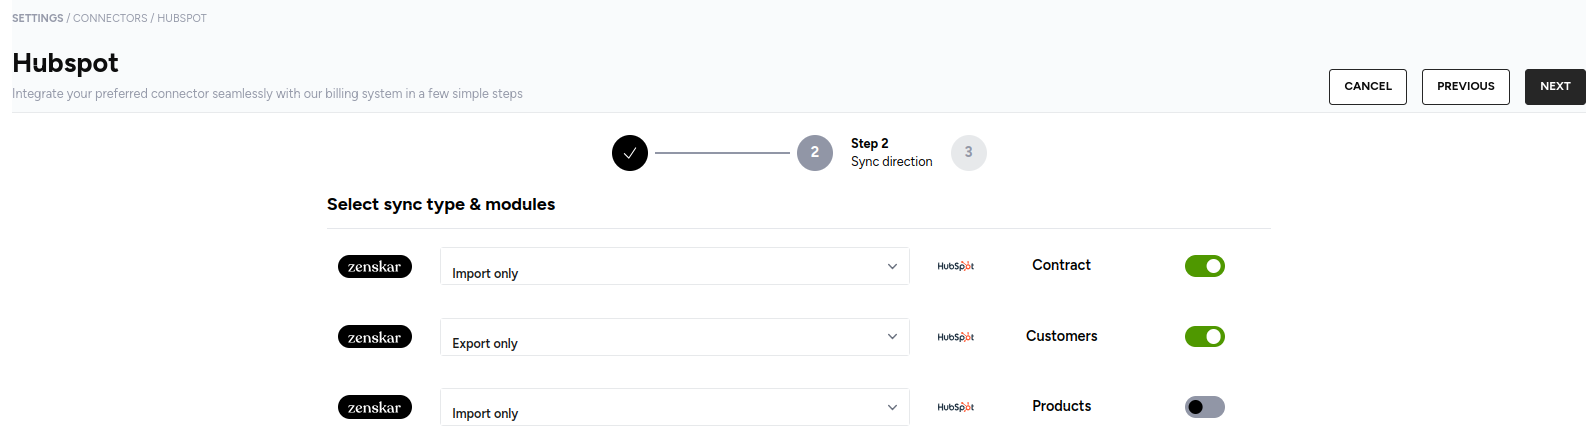
Fig. 2: Modules and sync types
🔁 Data mapping
A customer object in Zenskar maps to a company object in HubSpot
| Zenskar customer property | HubSpot company property |
|---|---|
| customer_name | name |
| address.line1 | address |
| address.line2 | address2 |
| address.city | city |
| address.state | state |
| address.postal_code | zip |
| address.country | country |
A contract object in Zenskar maps to a deal object in HubSpot
| Zenskar contract property | HubSpot deal property | Front-end value |
|---|---|---|
| name | dealname | Deal Name |
| start_date (refer the note below) | contract_start_date__zenskar_ | Contract Start Date (Zenskar) |
| end_date (refer the note below) | contract_end_date__zenskar_ | Contract End Date (Zenskar) |
| currency | deal_currency_code | Currency (refer currency settings in HubSpot) |
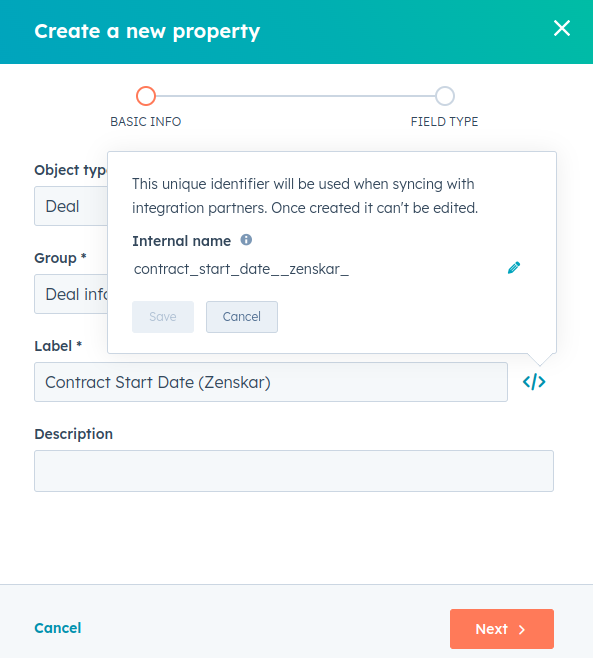
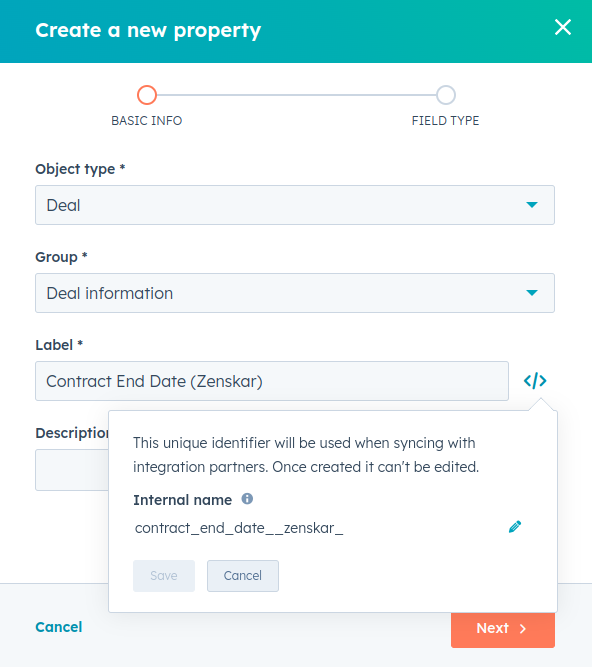
When you create a deal in HubSpot, you must create two properties with the following labels for integration with Zenskar:
-
Contract Start Date (Zenskar)
-
Contract End Date (Zenskar)
Labels are used in the HubSpot front end, as shown below:
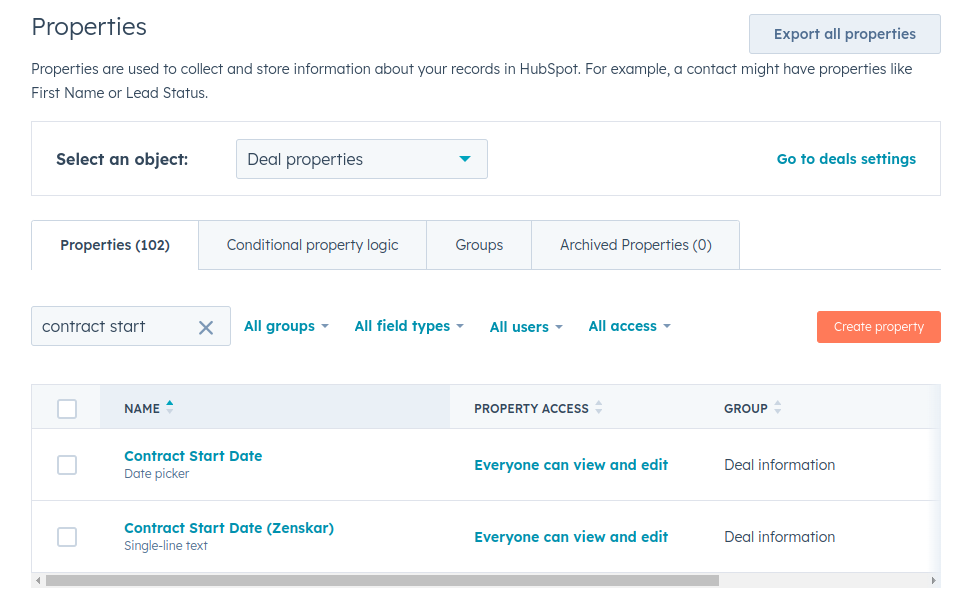
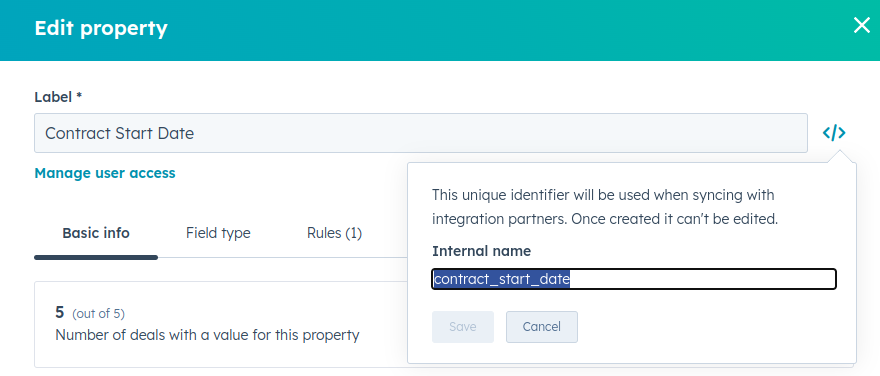
HubSpot uses labels to create internal names for integration partners like Zenskar. For the labels listed above, HubSpot creates the following internal names:
-
contract_start_date__zenskar_for Contract Start Date (Zenskar) -
contract_end_date__zenskar_for Contract End Date (Zenskar)
Note
Make sure that you use the labels listed above without any modifications. Any modifications in the labels will result in internal names that are incompatible with Zenskar's requirements. Consequently, the integration will fail. Remember that an internal name is a unique identifier that is used when syncing with integration partners like Zenskar. Once created, an internal name cannot be edited.
For example, HubSpot creates
contract_start_dateas internal name for the label Contract Start Date. However, Zenskar requirescontract_end_date__zenskar_for integration to work.
Create a new property labeled Contract Start Date (Zenskar)
Create a new property labeled Contract End Date (Zenskar)
A product object in Zenskar maps to a product object HubSpot
| Zenskar product property | HubSpot product property |
|---|---|
| price | price |
| quantity | quantity |
| currency | hs_line_item_currency_code |
- Zenskar will always use the per-unit pricing model.
- Zenskar will always use the prepaid billing type.
- Discounts will be:
- percentage-based if the product in HubSpot offers percent discount (HubSpot internal name:
hs_discount_percentage) - fixed if the product in HubSpot offers unit discount (HubSpot internal name
discount)
- percentage-based if the product in HubSpot offers percent discount (HubSpot internal name:
Creating a full-fledged test account in HubSpot
You can use test accounts to test an integration without affecting any real HubSpot data. Test accounts have access to Enterprise versions of the HubSpot Marketing, Sales, and Service Hubs, allowing you to test most HubSpot tools and APIs.
Test accounts are created and managed within developer accounts. If you don’t already have a developer account, you can sign up for one here.
Once you sign in to your developer account, you'll have the option of creating an app or creating a test account.
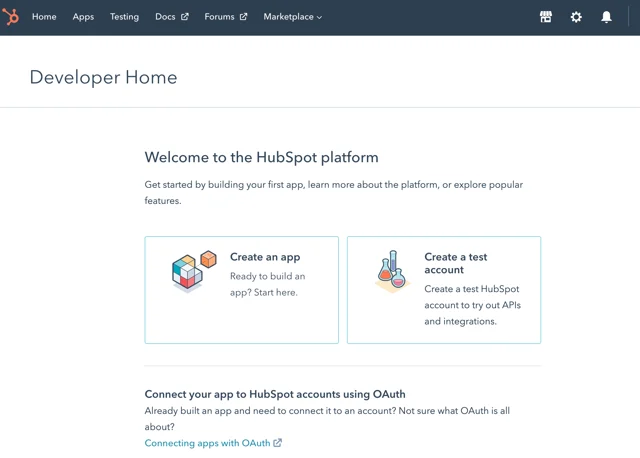
You can also get to the Testing dashboard using the Testing link in the top navigation menu.
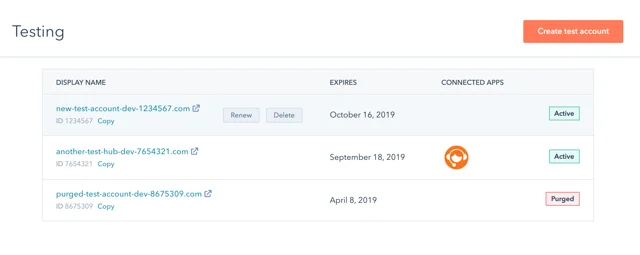
On the Testing dashboard, click the orange button that says “Create test account.” This page will also show any existing test accounts, their expiration date, and connected apps. Once your test account is created, you can install your integration.
Expiration and renewal
Test accounts expire after 90 days. They can be renewed in two ways:
Manually: Go to your developer account’s Testing dashboard and hover over the row for the test account you want to renew. Click the “Renew” button. (See above.) This resets the 90-day clock for your account. Accounts can be manually renewed up to 90 days after their original expiration date.
Using an API call: If your test account was authenticated using an OAuth access token, any API calls made to that account will automatically renew it.
- This only applies to API requests made using OAuth tokens generated from an application in the same developer account as the test account you want to renew.
- Renewals must be made no more than 30 days before the test account’s expiration date
- API requests made using OAuth outside the 30-day window will not automatically renew the test account.